



Vape Device Maintenance Guide: Cleaning, Coils & Battery Care

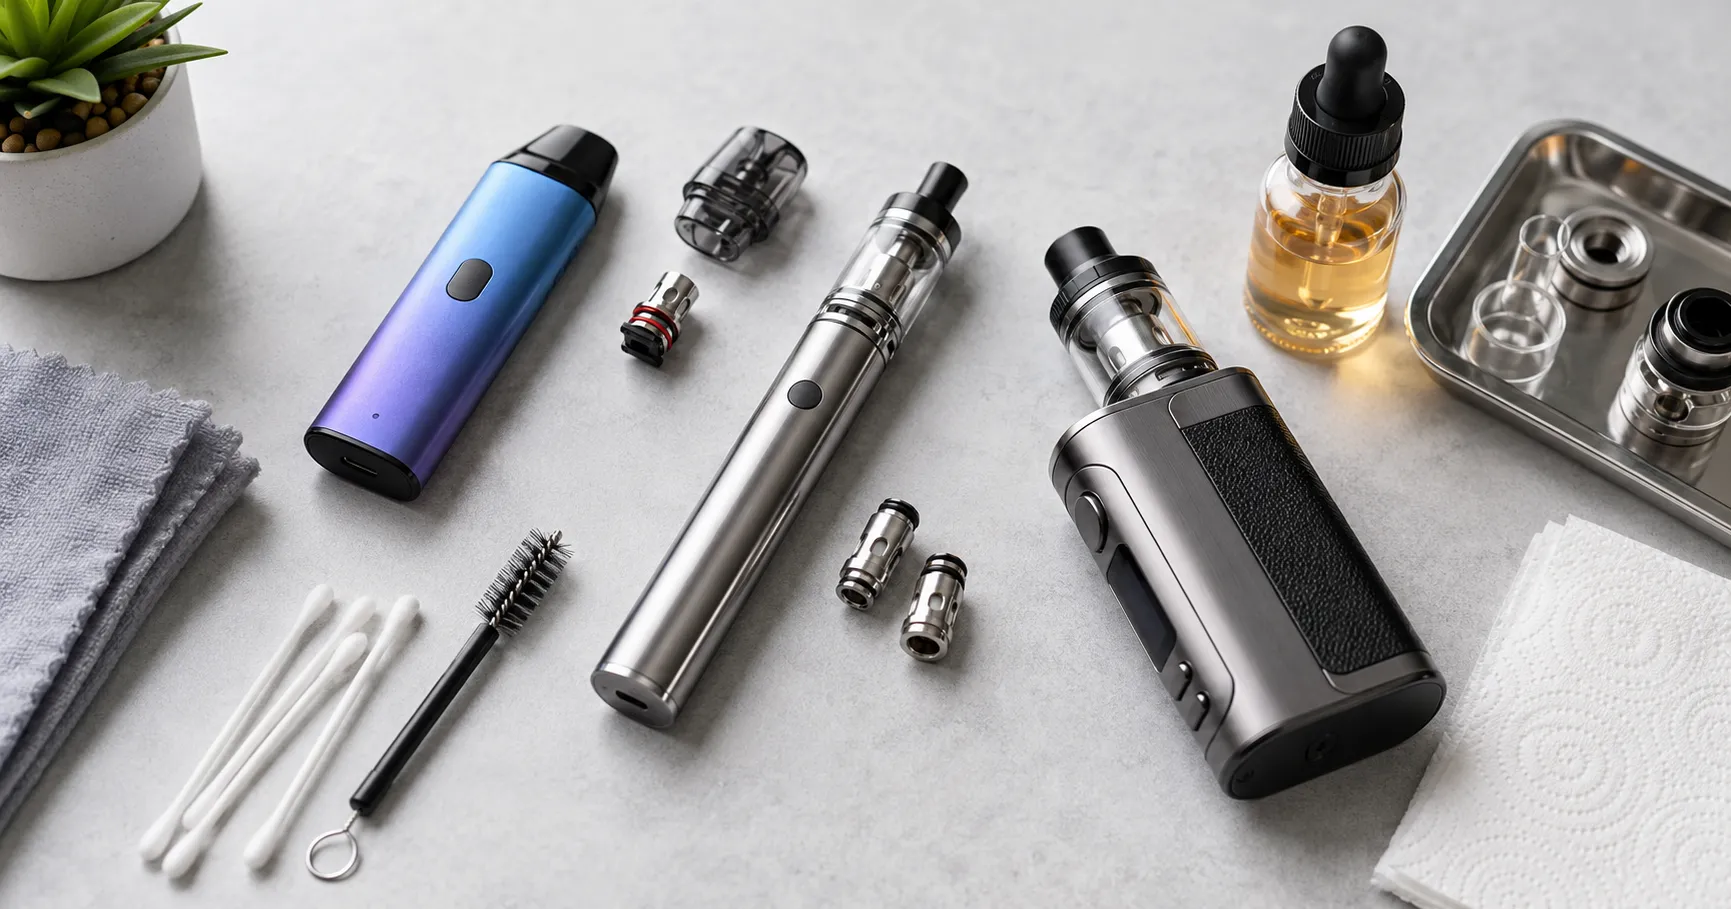
Practical maintenance guidance for legal-age adults using refillable pod systems, vape kits, and regulated vape devices.
Good vape device maintenance comes down to a few basic habits: keep the device clean and dry, remove e-liquid and condensation from connection points, replace worn coils or pods when needed, charge the battery correctly, and protect the device from excessive heat and physical damage.
You do not need to take the entire device apart every day. Regular inspection and simple cleaning are usually more useful than aggressive cleaning.
This vape device maintenance guide explains how to care for pods, tanks, coils, mouthpieces, batteries, charging ports, and device contacts without assuming that every vape works the same way.
Always follow the manual for your exact model. Cleaning methods, replacement parts, battery requirements, and maintenance procedures can differ between devices.
Author: Mr. Ismail
Company: VAP DXB
Adult-use notice: This article is intended for legal-age adults who already use vaping products. It does not encourage non-users to begin vaping. The CDC states that no tobacco product, including e-cigarettes, is safe, and nicotine is highly addictive.
Why Does Vape Device Maintenance Matter?
Regular maintenance helps keep the device’s connections, airflow system, pod or tank, and replaceable parts functioning as intended.
E-liquid residue and condensation can collect around pod contacts, tank connections, airflow channels, and mouthpieces. Manufacturers such as Innokin specifically recommend keeping connection areas clean and monitoring them for liquid buildup.
Maintenance can also help you notice problems before they become more serious.
A loose pod, damaged seal, contaminated connection, worn coil, damaged charging cable, or unusually hot battery should not simply be ignored.
Maintenance is not a way to make a vape device last forever. Coils, pods, seals, batteries, and other components wear over time and may eventually require replacement.
Read Here: How to Choose the Right Vape Device
A Simple Vape Maintenance Schedule
There is no universal maintenance schedule that fits every vape device. How often a device needs attention depends on its design, how frequently it is used, the e-liquid, the coil, and environmental conditions. Manufacturers also provide model-specific instructions.
A practical inspection routine can look like this:
Device Area | What to Check | Practical Timing |
Mouthpiece | Condensation, residue, dirt | Inspect regularly |
Pod or tank | Leaks, cracks, residue | Check during refilling |
Pod contacts | E-liquid or condensation | Check when removing pod |
Coil | Burnt taste or poor performance | Replace when condition requires |
Airflow | Condensation or obstruction | Inspect regularly |
Battery/device body | Damage, unusual heat, liquid | Check during normal handling |
Charging port | Dirt, moisture, damage | Check before charging |
Seals/O-rings | Damage or incorrect position | Check if leaking occurs |
The goal is not to clean everything constantly. It is to notice buildup, wear, or damage and deal with it appropriately.
How to Clean a Vape Device Safely
Separate the electronic device from the pod or tank before cleaning whenever the design allows, and keep water away from the battery or mod section.
Innokin’s cleaning guidance specifically warns against submerging its battery or mod sections in water. It recommends wiping residue from the device and paying attention to the atomizer connection.
For removable atomizers, Innokin recommends disassembling the atomizer and rinsing appropriate non-electronic components while excluding the coil, then allowing the parts to dry before reassembly.
Because designs vary, use this general process:
- Turn the device off if it has a power function.
- Disconnect it from any charging cable.
- Remove the pod or tank if the device allows it.
- Empty or secure any remaining e-liquid before disassembly.
- Wipe the device body and connection area with an appropriate clean cloth.
- Clean removable non-electronic parts according to the manufacturer’s instructions.
- Allow cleaned components to dry completely.
- Inspect seals, contacts, the pod, and the coil before reassembly.
- Reassemble the device according to the manual.
Do not assume that every pod, coil, or tank can be rinsed. Some pods contain an integrated coil. Other systems use removable coils. Follow the manufacturer’s cleaning instructions for that specific component rather than applying one method to every device.
How to Clean the Mouthpiece
The mouthpiece, also called the drip tip on some devices, is one of the easiest parts to inspect regularly. Condensation may collect inside or around it during normal operation. Innokin advises periodically checking drip-tip and airflow areas for condensation and wiping buildup away.
If the mouthpiece is removable and the manufacturer permits washing, remove it first and clean it separately. If it is part of an integrated pod, wipe accessible surfaces carefully instead of soaking the complete pod unless its instructions specifically allow that. Make sure the mouthpiece is dry before putting the device back together.
How to Clean a Refillable Vape Pod
A refillable pod should be checked for e-liquid residue, condensation, cracks, damaged seals, and dirty electrical contacts.
Remove the pod and inspect its bottom surface. If there is condensation or e-liquid around the contact area, wipe it away before reinstalling the pod. Dirty contacts can interfere with the electrical connection between the pod and device. Innokin troubleshooting guidance specifically recommends checking that pod connection areas are clean and undamaged.
Do not flood the pod bay with water or cleaning liquid.
If the pod uses an integrated coil, replacing the whole pod may be necessary when the coil reaches the end of its useful life.
If it uses a replaceable coil, the pod itself may last longer than the coil, provided it remains undamaged and compatible with the device.
You can see here Refillable Pod Systems
How to Clean a Vape Tank
Tank systems usually contain more removable components than compact pods. Depending on the design, these can include the tank section, glass, mouthpiece, coil, base, airflow ring, and seals.
For compatible atomizers, manufacturer guidance may allow the non-electronic tank components to be rinsed after disassembly. Innokin, for example, instructs users to remove the coil before rinsing atomizer components and to allow them to air-dry afterward.
Pay close attention to seals and O-rings while cleaning. A seal that is damaged, twisted, missing, or installed incorrectly may contribute to leaking. Do not force parts during reassembly. Cross-threading a tank or tightening components incorrectly can damage the hardware.
Should You Clean or Replace a Vape Coil?
A worn or burnt coil usually needs replacement rather than aggressive cleaning. There is no reliable universal rule such as “replace every seven days” that applies to all coils.
Coil life can vary according to the coil design, power settings, e-liquid composition, usage pattern, and whether the wick has been allowed to dry out. Vaporesso’s troubleshooting information identifies dry operation and unsuitable liquid conditions among factors that can contribute to coil burning.
Consider inspecting or replacing the coil when you notice persistent signs such as:
- Burnt or unusually harsh taste
- Clear decline in normal flavor
- Performance that remains poor after basic troubleshooting
- Visible damage
- Persistent problems that the manufacturer identifies as coil-related
That is the main bullet section in this guide because these condition-based signs are more useful than an invented replacement calendar.
A coil that is genuinely burnt cannot normally be restored to new condition simply by washing it.
See Here Vape Coils Collections.
Prime a New Coil Before Normal Use
If your device uses a replaceable wick-and-coil system, follow the manufacturer’s priming instructions before using a new coil. Priming allows the wick to absorb e-liquid before the coil is heated.
Exact procedures and waiting times differ between manufacturers and coil designs. For example, Innokin instructs users of compatible replaceable-coil products to saturate the wick and allow time for the coil to absorb liquid before operation.
Vaporesso likewise advises allowing newly installed compatible coils or pods time to saturate before operation to reduce the chance of burning the wick. Do not apply one brand’s priming method blindly to another product. Check the manual for the exact coil or pod being installed.
Keep the Pod and Device Contacts Clean
The small electrical contacts between a pod and battery are easy to overlook. They matter because the device must establish a reliable connection with the installed pod or atomizer. If the device suddenly stops recognizing the pod, fails to activate, or behaves inconsistently, one of the first simple checks is whether the connection area contains condensation or e-liquid.
Innokin’s product troubleshooting pages repeatedly recommend keeping pod contact surfaces clean and checking them when connection problems occur. Turn the device off before cleaning where possible. Allow the connection area to dry completely before reinstalling the pod and using the device.
Clean the Airflow Area
Condensation can also collect near the airflow openings. If airflow becomes restricted, inspect the accessible channels for condensation, liquid, or debris. Do not push sharp objects deep into the device. A simple wipe of accessible areas is safer than trying to dismantle components that were not designed for user servicing.
Some manufacturers specifically recommend checking the airflow-control section for condensation buildup and wiping it clean periodically. If airflow remains abnormal after normal cleaning, consult the manual or manufacturer rather than forcing the mechanism.
How to Prevent Vape Device Leaks
A small amount of condensation is not always the same thing as a major e-liquid leak. However, repeated liquid accumulation should be investigated. First check whether the pod or tank is assembled correctly. Look at the fill port, seals, coil installation, tank glass, and other removable components.
Avoid assuming that every leak comes from a defective device. Incorrect assembly, a damaged pod, worn seals, incompatible components, or a poorly seated coil may also be involved. If liquid reaches the device connection, wipe it away promptly and allow the area to dry.
If the leak continues after correct assembly and compatible replacement parts are installed, stop using the affected pod or tank until the cause is identified.
Protect the Battery and Charging System
Battery care is one of the most important parts of vape device maintenance. FDA battery-safety guidance recommends charging vape devices on a clean, flat surface where they can be seen, away from easily flammable materials. It also advises protecting them from extreme temperatures.
Use the charging equipment and specifications recommended for your exact model. Do not assume that a cable or power adapter is suitable simply because the connector fits. Inspect the charging port and cable for obvious damage before charging. If the device becomes unusually hot, swells, produces an abnormal smell, or shows other signs of battery failure, stop using it.
FDA has received reports involving overheating, fires, and explosions associated with vaping products. Never try to repair a damaged lithium-ion cell yourself.
Built-In vs Removable Battery Maintenance
Built-in and removable batteries require different handling. With an integrated battery, the cell is enclosed inside the vape device. If the battery itself develops a serious fault, the correct solution may involve replacing the device or contacting the manufacturer rather than opening the housing. A removable-battery mod allows the cell to be removed, but that creates additional responsibility.
Only use the battery type and specification required by the manufacturer. Do not use visibly damaged cells or improvise with incompatible battery sizes. Battery wraps, terminals, and cell condition should be inspected according to the device and battery manufacturer’s safety guidance. If you do not fully understand removable-battery requirements, do not guess.
Do Not Ignore an Overheating Vape Device
A vape device becoming abnormally hot can indicate a problem and should not simply be treated as normal maintenance. Some heat around a coil during operation is expected, but a device that becomes unusually hot, stays hot, or heats unexpectedly should be switched off and disconnected from charging.
Innokin advises discontinuing use when certain devices become excessively hot or show signs of malfunction. If the problem involves the battery or electronics rather than the removable pod or coil, contact the manufacturer or retailer for model-specific guidance. Do not continue repeatedly activating an overheating device to “test” whether it has fixed itself.
Protect Vape Devices From Heat in the UAE
High-temperature storage deserves particular attention for devices used in the UAE. FDA advises keeping vape devices out of extreme temperatures and specifically warns against leaving them in direct sunlight or inside a hot vehicle.
Manufacturer guidance gives similar warnings. Innokin states that excessive heat can damage a vaporizer and warns against storing certain devices in a car during hot conditions. That makes one maintenance rule especially important in Dubai and the wider UAE:
Do not leave a vape device or its battery in a parked vehicle exposed to heat. Store the device in a cool, dry location away from direct sunlight and heat sources.
Keep E-Liquid Away From the Electronics
A refillable device contains both liquid and electronics, and those two parts should stay separated. Wipe spills promptly instead of allowing e-liquid to remain around the battery, charging port, pod contacts, or buttons.
If nicotine-containing e-liquid gets on skin, FDA recommends washing the affected area thoroughly with soap and water. If it enters the eyes, rinse with water and seek medical attention if vision changes occur.
CDC also notes that acute nicotine exposure can be toxic and that poisoning can occur through swallowing or exposure through the skin or eyes. Keep e-liquids and devices securely away from children and pets.
How Should You Store a Vape Device?
Store a vape device in a cool, dry location where it will not be exposed to direct sunlight, extreme heat, water, or accidental activation.
If the device has a lock or power-off function, use it when storing or carrying the device according to its manual. Do not place the device loosely with metal objects if its design or battery configuration could allow electrical contact or damage.
Keep the mouthpiece and airflow openings reasonably protected from dust and debris. For longer storage, follow the manufacturer’s recommendations for battery charge level and whether a pod or tank should remain attached. Do not assume the same long-term storage procedure applies to every battery chemistry or device.
What to Do If a Vape Device Is Not Working
A device that stops working does not always require replacement. Start with basic checks before assuming the electronics have failed. Confirm that the battery has charge, the device is turned on, and the correct pod, tank, or coil is installed. Then inspect the connection area for liquid or dirt. Manufacturer troubleshooting guidance often recommends checking the pod connection and cleaning condensation before replacing components.
If the device displays an error code, look up that exact code in the manufacturer’s manual. Avoid random fixes from unrelated devices. A flashing LED pattern or error message can mean different things on different models.
What If the Vape Device Is Not Charging?
First inspect the charging port, cable, and power source. Make sure the port is dry and free from visible debris. Do not insert metal objects into a charging port to scrape it clean. Try only charging equipment that meets the manufacturer’s specifications. If a known-compatible cable does not solve the problem, consult the manual before assuming the battery has failed.
Stop charging immediately if you notice abnormal heating, swelling, smoke, unusual odor, or visible battery damage. FDA specifically advises charging on a flat, visible surface away from materials that can easily catch fire.
What If the Vape Tastes Burnt?
A persistent burnt taste commonly means the wick or coil needs attention and may require replacement. First stop repeatedly activating the device. Check whether the tank or pod contains enough compatible e-liquid and whether the coil was properly saturated.
Also confirm that adjustable wattage has not been set outside the coil manufacturer’s recommended range. If a properly filled and correctly configured device continues to produce a persistent burnt taste, replace the compatible coil or integrated-coil pod. Manufacturer troubleshooting materials identify dry operation and insufficient saturation as causes of coil burning.
What If the Vape Is Gurgling or Spitting?
Gurgling can occur when excess liquid enters an area of the coil or airflow system where it interferes with normal operation. Start by checking the pod or tank assembly, liquid level, seals, coil installation, and airflow area. Wipe away accessible condensation.
Do not dramatically increase power simply to try to burn away excess liquid unless the manufacturer specifically instructs that procedure. If the problem repeatedly returns, check whether the installed coil and e-liquid are suitable for the device.
Common Vape Maintenance Mistakes
Over-cleaning can cause almost as many problems as ignoring maintenance. You do not need to soak an electronic device to make it clean. Another mistake is treating every coil as washable. Some manufacturers provide cleaning procedures for specific components, while others direct users to replace the coil.
Using random replacement parts can also create problems. A pod that physically fits is not necessarily electrically or mechanically compatible. Ignoring repeated leaks is another poor habit. Liquid that continually reaches the electronics should be investigated rather than wiped away indefinitely.
Finally, do not use maintenance as a reason to continue operating damaged hardware. A cracked pod, severely damaged connector, swollen battery, or malfunctioning device needs appropriate replacement or professional manufacturer support.
When Should You Replace the Device Instead of Maintaining It?
Maintenance makes sense when the problem involves ordinary residue, condensation, a worn pod, or a replaceable coil. Replacement or manufacturer assessment becomes more appropriate when the issue involves the device itself.
Examples include serious physical damage, battery swelling, persistent overheating, damaged charging hardware, liquid intrusion into inaccessible electronics, or repeated faults that continue with known-compatible replacement parts.
Do not open a sealed lithium-ion battery housing to attempt a home repair. If there is uncertainty about battery safety, stop using the device until the manufacturer or another qualified source can assess the problem.
See here: Vape Devices Collections.
Frequently Asked Questions (FAQ)
Maintain a vape device by keeping the mouthpiece, pod or tank, airflow area, and electrical contacts clean while keeping the battery section dry. Inspect the device regularly for leaks, damage, coil wear, and charging problems. Follow the manufacturer's instructions for any cleaning that involves disassembly.
There is no single cleaning interval that applies to every vape device. Inspect accessible areas regularly and clean residue or condensation when it appears. Manufacturer guidance also suggests cleaning compatible atomizers when changing coils or switching substantially different e-liquids.
Do not submerge the electronic battery or mod section in water. Some removable non-electronic atomizer parts may be washable if the manufacturer allows it. Innokin, for example, permits rinsing certain atomizer components while specifically excluding the coil and electronic mod.
Remove the pod, switch off the device where possible, and carefully wipe condensation or e-liquid from the contact area. The contacts should be clean and dry before the pod is reinstalled. Dirty connections are one troubleshooting point identified by vape manufacturers.
A vape coil should be changed based on its condition rather than an arbitrary universal number of days. Coil life varies with the coil, liquid, power, and usage. Persistent burnt taste or poor performance can indicate that replacement is needed.
Cleaning cannot reliably restore a genuinely burnt wick to new condition. If correct filling, priming, and settings do not resolve the burnt taste, replacing the coil or integrated-coil pod is generally the appropriate next step.
Repeated leaking can come from several causes, including assembly problems, damaged seals, pod or tank damage, or improperly installed components. Check the exact manufacturer's troubleshooting instructions rather than assuming the entire device is defective.
No. A vape device should not be stored in a hot vehicle. FDA advises protecting vape batteries from extreme temperatures, including direct sunlight and hot cars. Manufacturer guidance also warns that excessive heat can damage devices.
Stop using and charging a vape device if the battery or device becomes abnormally hot. Disconnect it from charging and follow the manufacturer's safety instructions. FDA has received reports involving vape battery overheating, fires, and explosions.
A dirty, wet, damaged, or incorrectly seated connection can prevent some devices from recognizing a pod. Remove the pod and check that both the pod base and device contacts are clean, dry, and undamaged. If the problem continues, follow the model-specific troubleshooting guide or try a known-compatible replacement pod.
Final Takeaway
A good vape device maintenance routine does not need to be complicated. Keep the mouthpiece and airflow areas clean, remove condensation from pod and tank connections, keep electronics dry, replace coils or pods according to their condition, and follow the manufacturer’s charging and battery instructions.
For adults using vape devices in the UAE, heat deserves extra attention. Avoid leaving devices or batteries in direct sunlight or hot parked vehicles, and stop using hardware that shows signs of battery damage, serious overheating, or electrical malfunction.
If you are maintaining a refillable setup, you can also review our Vape Coils, Pod Systems, and How to Choose the Right Vape Device guides for compatibility and hardware information.