



How to Fill a Vape Pod or Tank

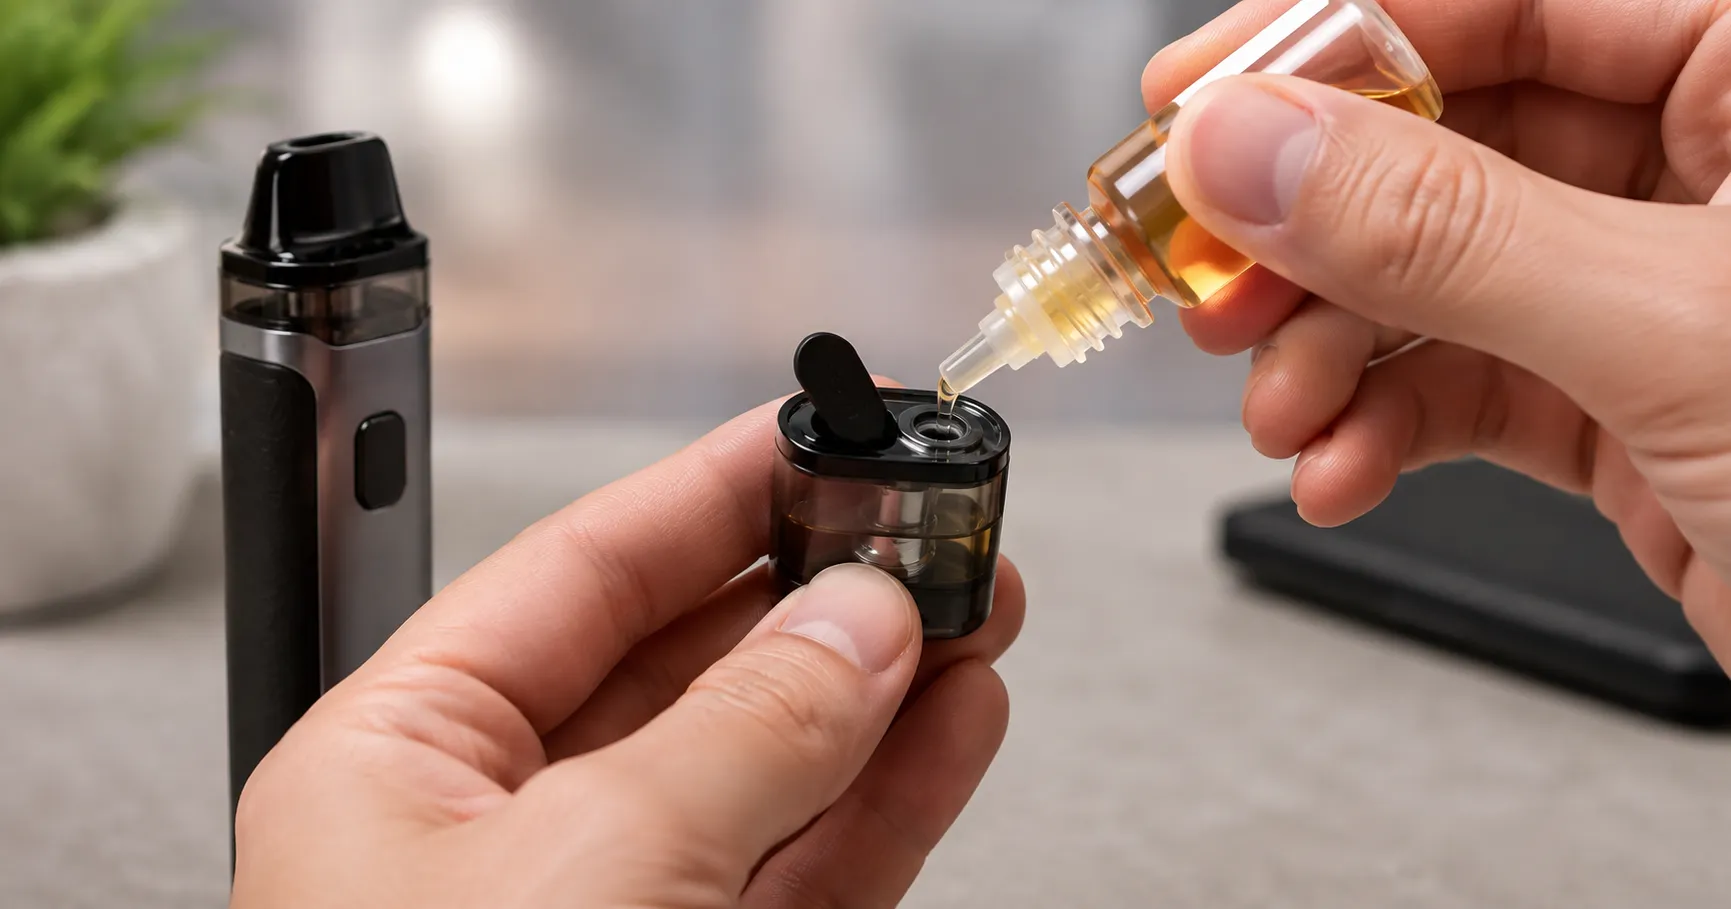
An adult-focused guide to refill ports, e-liquid filling, coil priming, leak prevention, and common refill mistakes. Filling a vape pod or tank usually involves opening the correct refill port, adding compatible e-liquid without overfilling, closing the port securely, and allowing a new coil or pod to become saturated before use.
The exact method depends on the device. Some pods use top-fill systems, while others refill from the side or bottom. Tanks may use screw-off caps, sliding top caps, or other manufacturer-specific mechanisms. Vaporesso, for example, documents top-fill, side-fill, bottom-fill, press-to-fill, screw-open, and slide-open designs across different products.
Because of these differences, the safest approach is to identify the filling system on your exact device before adding e-liquid.
Author: Mr. Ismail Owner VAP DXB
Adult-use notice: This guide is intended for legal-age adults who already use vaping products. It does not encourage non-users to begin vaping.
How Is a Vape Pod or Tank Filled?
A refillable vape pod or tank is filled by opening its designated fill port and placing the e-liquid bottle nozzle into that opening without pouring liquid into the central airflow path.
After filling, close the port securely and wipe away any spilled liquid.
The most important rule is simple:
Use the actual filling port rather than assuming every opening in the pod or tank is for e-liquid.
Depending on the model, the fill opening may be hidden beneath a silicone plug, underneath a removable mouthpiece, under a sliding top cap, or on the side or bottom of the pod.
For example, Innokin’s MVP Pod uses a side fill-port gasket. Its instructions tell users to pull back the gasket, insert the bottle nozzle into the fill opening, and avoid overfilling the pod.
Read here: Vape Device Maintenance Guides
Know Your Vape Filling System First
Refillable devices do not use one universal filling design. Vaporesso’s official support material shows several different systems across its hardware, including top filling, side filling, bottom filling, press-to-fill, slide-open filling, and screw-open tank filling. That is why instructions from one vape should not automatically be applied to another.
Top-Fill Pods
A top-fill pod allows access to the refill opening from the upper part of the pod. Depending on the design, you may remove or open the mouthpiece to reveal the refill port. Some Vaporesso XROS pods, for example, use a top-fill design, while other XROS cartridges have used side filling. Top filling can make it possible to refill certain pods without opening a plug on the lower portion of the cartridge.
Side-Fill Pods
A side-fill pod uses a refill opening located on the side of the cartridge. It is commonly protected by a silicone or rubber gasket. Innokin’s MVP Pod is one example. The manufacturer instructs users to open the side gasket and fill through the designated hole rather than another opening in the pod. After filling, press the plug securely back into place. A poorly closed fill gasket can contribute to leaking.
Bottom-Fill Pods
A bottom-fill pod places the filling opening on the underside of the cartridge. The pod normally needs to be removed from the battery before filling. One example is Innokin’s Glim pod, which uses a designated filling opening on the underside of the cartridge. After refilling a bottom-fill pod, check the exterior for liquid before reinstalling it onto the battery contacts.
Top-Fill Vape Tanks
Many refillable tanks provide access from the top. The exact mechanism can differ. Some caps unscrew. Others slide sideways or rotate to expose a filling opening. Vaporesso documents slide-open and screw-open filling mechanisms among its tank designs. Do not force a tank cap if you are unsure how it opens.
How to Fill a Refillable Vape Pod Step by Step
The exact instructions for your pod take priority, but the general process is straightforward.
- Identify the fill port. Look for the manufacturer’s marked filling hole, silicone plug, or top-fill opening.
- Remove the pod if required. Side-fill and bottom-fill designs may need to be removed from the device first.
- Open the fill port carefully. Do not tear or stretch a silicone plug more than necessary.
- Insert the e-liquid nozzle into the correct opening. Avoid the central airflow or chimney opening.
- Fill slowly. Leave the amount of air space recommended by the manufacturer and do not overfill.
- Close the fill port securely. Make sure any plug, cap, or mouthpiece is properly seated.
- Wipe away liquid. The outside of the pod and its electrical contacts should be clean and dry before installation.
- Let a new coil saturate. If the pod or coil is new, follow the manufacturer’s priming and waiting instructions before normal operation.
These are general principles rather than universal model-specific instructions.
Innokin, for example, tells users of its MVP Pod not to fill the cartridge completely to the top, while its broader troubleshooting guidance also warns that overfilling can allow liquid to enter areas where it can leak.
Do Not Fill the Central Airflow Tube
One of the easiest mistakes is confusing the airflow passage with the filling port. Many tanks have a central chimney or airflow opening running through the middle. That section is not normally where e-liquid should be poured. Liquid entering the airflow system can contribute to gurgling, spitting, or leakage. Use only the opening identified by the manufacturer for filling. If you cannot clearly tell which opening is correct, check the manual instead of guessing.
How Full Should You Fill a Vape Pod or Tank?
Do not automatically fill a pod or tank completely to the top. The correct fill level depends on the design. For example, Innokin’s MVP Pod instructions recommend approximately 90% capacity rather than completely filling the available space. Innokin’s general troubleshooting guidance also warns against overfilling tanks because liquid can enter the central coil section and leak through the bottom. This does not mean “90%” should be treated as a universal rule for every vape. Follow the fill level or capacity guidance for your actual device.
Should You Close the Airflow Before Filling a Vape Tank?
Some tank manufacturers recommend closing adjustable airflow during refilling, but this is device-specific. Innokin recommends closing the airflow control ports when refilling certain tanks, including the Zenith Pro and Zlide, then reopening the airflow after the filling and saturation process. That instruction should not automatically be applied to every tank. If your device has adjustable airflow, check its manufacturer’s filling instructions.
What Is Coil Priming?
Coil priming means allowing the coil’s wick to absorb e-liquid before the coil is heated for the first time. It matters when installing a new replaceable coil or a new pod with fresh wicking material. If the wick is heated while insufficiently saturated, it can become damaged and produce a burnt taste. Manufacturer instructions vary. Innokin, for example, provides priming instructions for compatible coils and tells users to allow filled coils time to saturate before operation. Some Innokin tank instructions specifically recommend applying liquid to exposed wick areas, filling the tank, and waiting before use. Do not assume that every coil should be manually dripped on. Integrated-coil pods may use a different priming process. Follow the instructions supplied for your particular pod or coil.
How Long Should a New Pod or Coil Sit After Filling?
There is no universal waiting time for every vape pod or coil. Different manufacturers give different instructions depending on coil and wicking design. Some Innokin products specify waiting several minutes after filling, while other manufacturer instructions may differ. The correct waiting time is therefore the one provided with the exact pod or coil. This is more reliable than following a generic rule from an unrelated device.
Refill Before the Pod Runs Completely Dry
Allowing a refillable pod or tank to operate without enough liquid around its wick can contribute to dry or burnt coil conditions. VOOPOO advises refilling reusable cartridges before they run dry as part of its maintenance guidance. The actual minimum liquid level differs by design. If the device has visible wick openings, keep them supplied according to the manufacturer’s instructions rather than waiting until the reservoir is completely empty.
Use E-Liquid Compatible With the Pod or Coil
Not every e-liquid formulation is appropriate for every coil or device. The relationship between coil design, wicking material, airflow, power, and e-liquid viscosity matters. For that reason, check the manufacturer’s recommendations for the specific pod or tank. Do not assume an e-liquid is compatible simply because the bottle nozzle fits into the filling port.
What Causes a Vape to Leak After Refilling?
A device that starts leaking immediately after filling may have a simple setup problem rather than a failed battery or electronics. Possible causes include overfilling, an incorrectly closed fill plug, a poorly installed coil, damaged seals, liquid in the airflow passage, or a pod or tank that was not assembled correctly. Innokin specifically identifies overfilling, coil installation, O-ring condition, and airflow-management issues in its leakage troubleshooting guidance. If liquid reaches the pod contacts or battery connection, remove the pod and clean and dry the accessible connection area before reinstalling it. Do not continue operating a device if liquid has entered inaccessible electronics or if the device shows an electrical fault.
Why Does a Vape Gurgle After Filling?
Gurgling can occur when excess e-liquid reaches the airflow or coil chamber. Overfilling or accidentally filling through the wrong opening can contribute to this condition. First check that the tank or pod was filled through its actual refill port. Then inspect the accessible airflow area and connection points for excess liquid or condensation. Do not repeatedly activate the device at unusually high power in an attempt to clear the problem. Use the manufacturer’s troubleshooting process for the specific model.
Why Does a New Coil Taste Burnt After Refilling?
A new coil that tastes burnt may not have absorbed enough liquid before it was heated. This is why coil priming matters. Manufacturer guidance commonly instructs users to saturate new wicking material and give it time to absorb liquid before normal use. Also check that the tank contains enough compatible e-liquid and that adjustable wattage is within the coil manufacturer’s recommended operating range. A genuinely burnt wick usually requires coil or pod replacement rather than repeated refilling.
Keep the Filling Area Clean
E-liquid residue around a refill opening can make it harder to close the plug properly. Before closing a side-fill or bottom-fill port, check whether liquid is sitting around the seal. Wipe excess liquid away with an appropriate clean material. Also inspect the outside of the pod before putting it back into the device. The contacts between the pod and battery should remain clean and dry.
What Should You Do If E-Liquid Spills?
Clean e-liquid spills promptly and avoid contact with the skin and eyes, particularly when the liquid contains nicotine. FDA advises washing exposed skin thoroughly with soap and water if e-liquid gets on it. If e-liquid enters the eyes, FDA recommends rinsing thoroughly with water and seeking medical attention if vision changes occur. FDA also warns that accidental exposure to nicotine-containing e-liquid can be harmful, particularly to children. Keep e-liquid containers securely stored away from children and pets.
Common Mistakes When Filling a Vape Pod or Tank
One common mistake is assuming every hole in the cartridge is a fill port. Another is filling the reservoir completely to the top even when the manufacturer recommends leaving some space. Some users also forget to close a silicone plug securely after filling. Another problem is reinstalling a pod while e-liquid is still covering the battery contacts. New coils can also be damaged when the device is used immediately without following the required saturation or priming procedure. The simplest way to avoid most of these problems is to use the filling method designed for the exact pod or tank rather than copying instructions from another device.
Top-Fill vs Side-Fill vs Bottom-Fill: Does It Matter?
The fill position mainly changes how you access the reservoir. A top-fill system may allow refilling from the upper portion of a cartridge. A side-fill pod normally requires opening a side gasket. A bottom-fill pod often needs to be removed from the battery. The filling position alone does not determine overall device quality. For example, Vaporesso has used both top-fill and side-fill cartridges within its XROS ecosystem. It therefore makes more sense to evaluate the complete device—including pod compatibility, coil design, airflow, battery, maintenance, and refill mechanism—rather than treating one filling style as automatically superior.
Frequently Asked Questions (FAQ)
Open the pod's designated refill port, insert the e-liquid bottle nozzle, fill without overfilling, and close the port securely. The fill port may be located at the top, side, or bottom depending on the pod design.
Open the tank's manufacturer-designed filling mechanism and add e-liquid through the correct fill opening. Some tanks use screw-off caps, while others use sliding or rotating top-fill mechanisms.
Not unless the manufacturer specifically identifies that opening as part of the filling system. Many devices have separate airflow and refill openings. Putting liquid into the wrong opening can cause flooding or leaking.
Not necessarily. Some manufacturers specifically warn against overfilling. Innokin, for example, recommends filling its MVP Pod to roughly 90% rather than completely to the top.
Leaks can result from overfilling, damaged seals, incorrect assembly, a poorly seated coil, or liquid entering the airflow system. Check the fill plug, pod or tank assembly, coil, seals, and accessible airflow areas.
Follow the manufacturer's priming instructions whenever a new coil or pod requires them. Priming allows fresh wicking material to become saturated before heating.
Use the waiting time specified by the pod or coil manufacturer. There is no universal waiting period because wicking systems vary between products.
A side-fill pod has an e-liquid filling opening on the side of the cartridge. The port is often protected by a silicone gasket that must be closed securely after filling. Innokin's MVP Pod is one example.
A top-fill pod allows the e-liquid reservoir to be accessed from the upper part of the cartridge. The mouthpiece or top section may open or detach depending on the design. Vaporesso uses top filling on several XROS-series pod configurations.
Clean the spill promptly and wash exposed skin thoroughly with soap and water. If e-liquid enters the eyes, rinse thoroughly with water. FDA recommends seeking medical attention if vision changes occur after eye exposure.
Final Takeaway
Knowing how a vape pod or tank is filled starts with identifying the refill system on the exact device. Top-fill, side-fill, bottom-fill, screw-open, and slide-open systems all exist, so there is no universal refill method. Use the designated fill port, avoid overfilling, keep e-liquid out of the airflow passage and electrical contacts, close the reservoir securely, and follow the manufacturer’s priming instructions when installing a new coil or pod. For more information about caring for refillable hardware, read our Vape Device Maintenance Guide, Vape Coils Guide, and How to Choose the Right Vape Device.